SFMC-Cookbook
How to survive as a developer for Salesforce Marketing Cloud
Encryption in Marketing Cloud
Keys
If you want to import files but not transfer unencrypted data, Marketing Cloud offered its public key that you could use to encrypt the files before transmitting them via SFTP. This public key file is available here for download. However, this option is no longer available for new File Transfers since June 2021. For new File Transfer you can create your own PGP/GPG key to de- and encrypt your data and import them into Marketing Cloud using Key Manager.
Creating PGP / GPG keys
For beginners, this might be challenging because, first of all, you need to create keys (yes, plural) that Marketing Cloud accepts, and then you have to understand how exactly to import them into Key Manager.
PGP / GPG uses an asymmetric method which means there is one key for encryption (the public key) and another for decryption (the private key, sometimes also named the secret key).
Download and install the GPG command-line tools for your system, and you are good to go.
If you are a Windows user, get a software like Gpg4win which comes with the command line tool
gpgplus a GUI namedKleopatrathat lets you de- or encrypt files with a nice visual interface and right from Windows Explorer's right-click-menu.For Mac users GPG Tools is a good option. Other users will find a tool under the above link.
In any case, you should end up with the new command gpg in your terminal/bash:
- Open Terminal
- Generate a key pair by entering
gpg --full-generate-key - Select "RSA and RSA" (should be option 1)
- Specify the key length to be
4096If you go with the default (currently 3072) instead, SFMC will prompt you with an error during creation.
- Enter the length of time the key should be valid.
- Now, enter your name and email
For other use-cases it might matter more what you enter here but in the context of SFMC this could be something generic.
- Optionally type a secure passphrase (recommended).
- Get the key ID of your newly generated key with:
gpg --list-secret-keys --keyid-format=long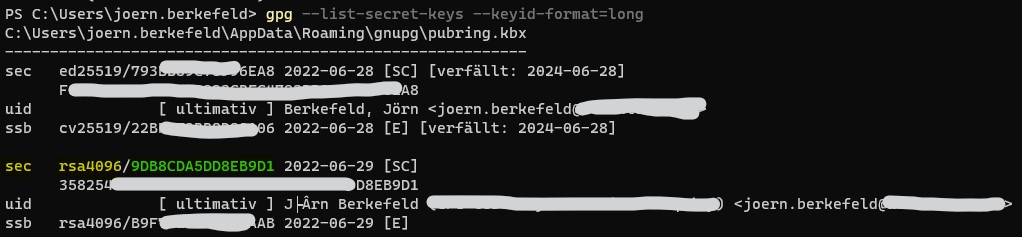 In the above example, the key you are looking for is
 9DB8CDA5DD8EB9D1. You can find it by looking for the prefixsec rsa4096(I marked it yellow & green in the screenshot). - Save your newly created public key as a file:
gpg --output public.asc --armor --export 9DB8CDA5DD8EB9D1Make sure you replace
9DB8CDA5DD8EB9D1with the key id you found! - Save your newly created private key as a file:
gpg --output private.pgp --armor --export-secret-key 9DB8CDA5DD8EB9D1Make sure you replace
9DB8CDA5DD8EB9D1with the key id you found!
Proceed to import one or both of these keys into SFMC's Key Manager.
Importing PGP / GPG keys into SFMC's Key Manager
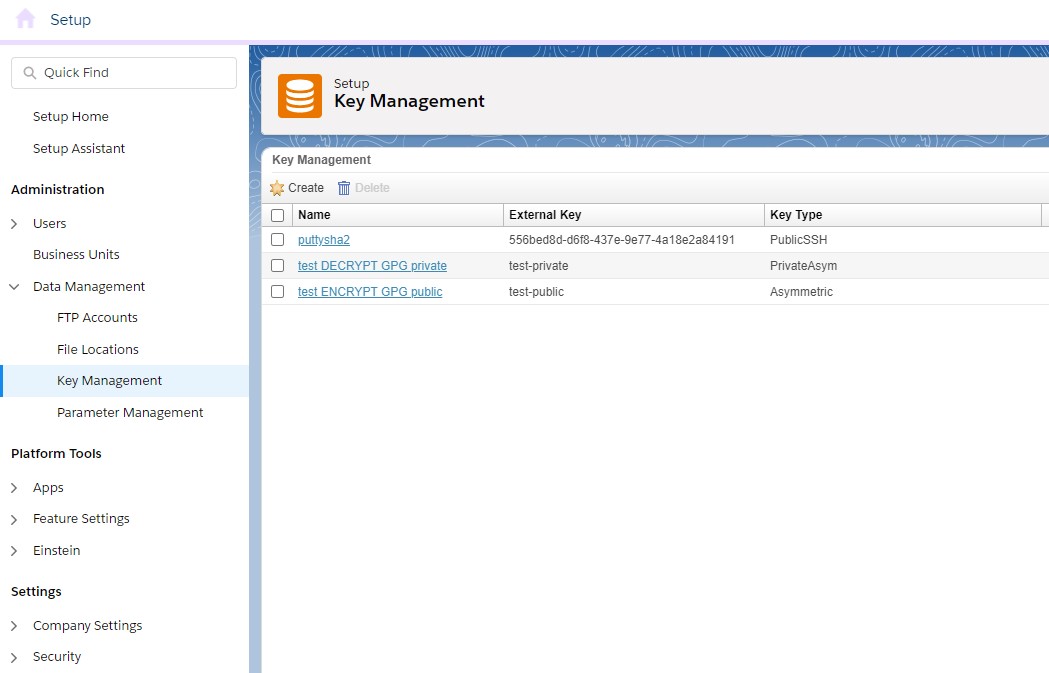
Key Manager can be found under Setup > Administration > Data Management and it allows you to store all clients of keys for various purposes. From setting up SSO, using AMPscript's EncryptSymmetric / DecryptSymmetric methods up to encrypting files via PGP or GPG.
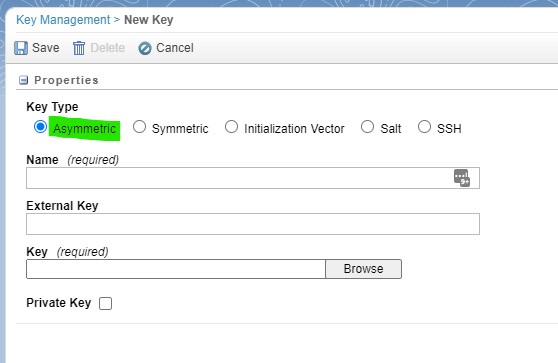
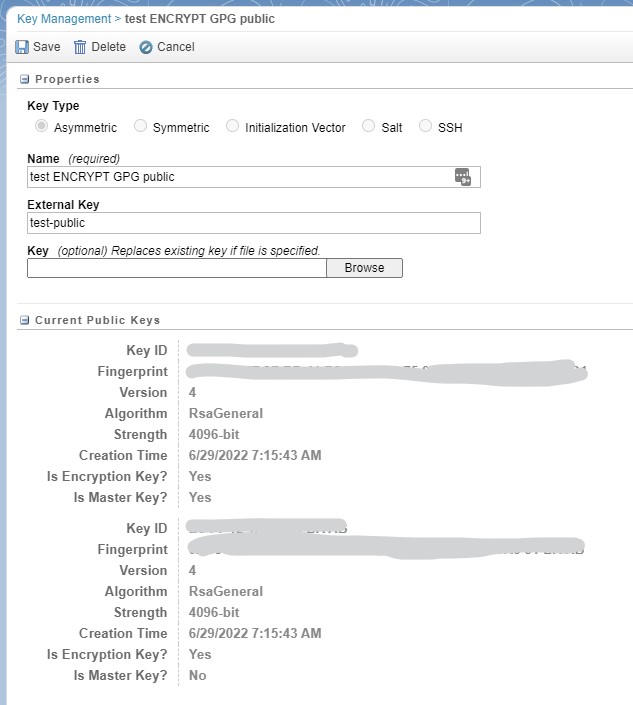
Click on "Create" to open the below form. Make sure to select Key Type "Asymmetric" and then decide what you need to upload. If you want to be able to decrypt files in SFMC that were encoded with your key and then stored in your SFTP, then please upload the public key (Private Key checkbox kept unchecked!).
If you want to encrypt files in SFMC before you store them on your SFTP for extraction by users or integration, then upload the private key (Private Key checkbox kept checked!). If you set up a passphrase to secure your private key, you have to enter it in the extra input field that appears. If you did not set up a passphrase, just leave this empty.
Choose the name wisely in case you have more than one key eventually. SFMC will only show you the public or private keys in Automation Studio depending on the task, but it will be easier for you if you give it descriptive names here, including the words "public" or "private".
You will see the uploaded keys listed similarly to the above screenshot. When clicking on the public key, you get a lot of info about it, while clicking on the private key reveals nothing - not even the file name you uploaded.

De- and encrypting things
Encrypting files to be shared via SFTP
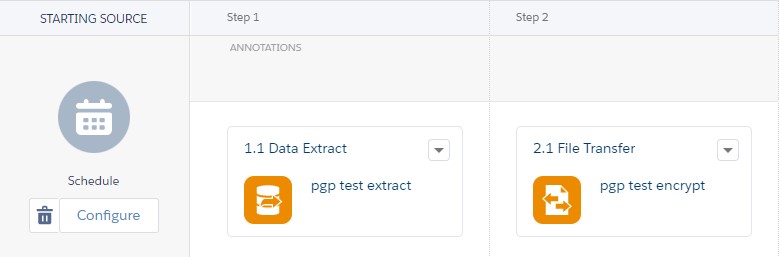
Once the public key is set up, you can create an Automation to export data from a DataExtension and have the data written into a CSV that is then encrypted. The automation only needs 2 steps: Data Extract and File Transfer.
The first step is relatively straightforward. Choose any file name you like (e.g., pgp-extract-%%Year%%-%%Month%%-%%Day%%.csv).
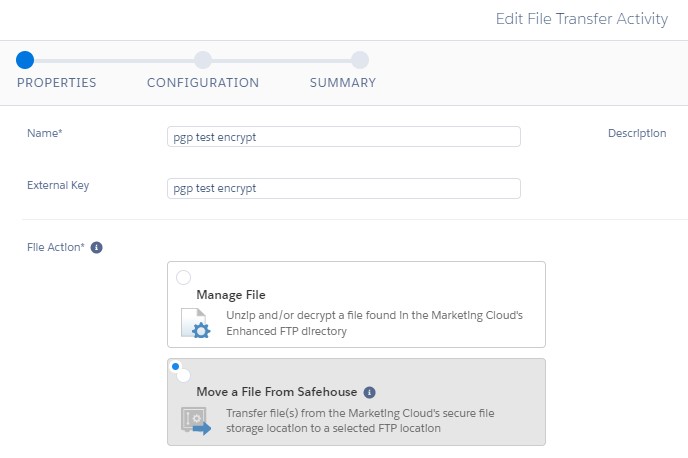
Second, we set up the File Transfer to move the just exported file from the Safehouse to our chosen file location. I opted for the export/ folder in the below example:
Make sure the File Name Pattern matches the same you entered in the Data Extract:
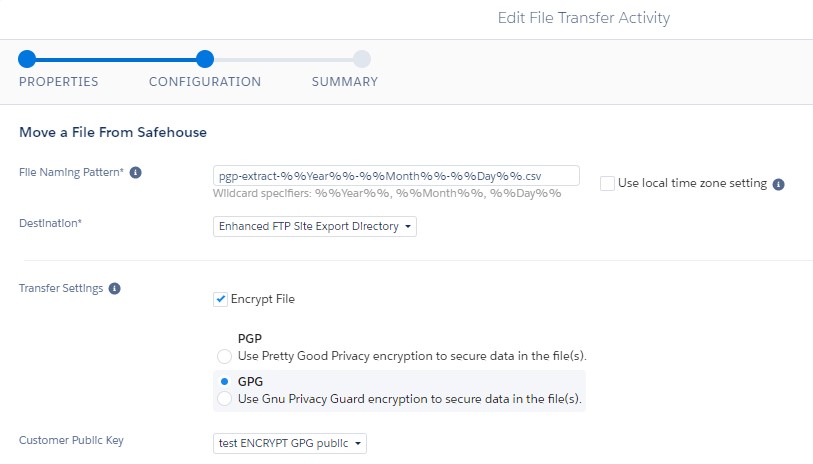
And that's it - instead of pgp-extract-%%Year%%-%%Month%%-%%Day%%.csv you will find pgp-extract-%%Year%%-%%Month%%-%%Day%%.csv.gpg in your folder, which can then be decoded using your private key on the receiving end.
Decrypting files incoming via SFTP
To decrypt incoming files, you will need the private key in your key manager that matches the public key used for encrypting them!
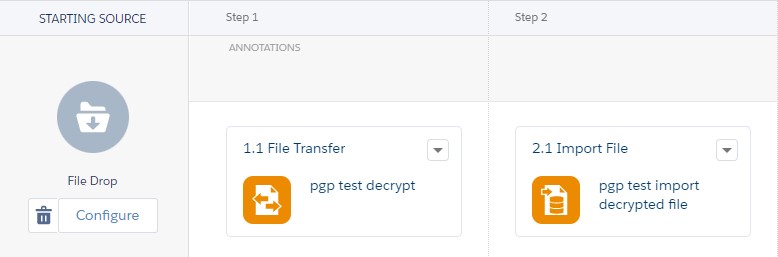
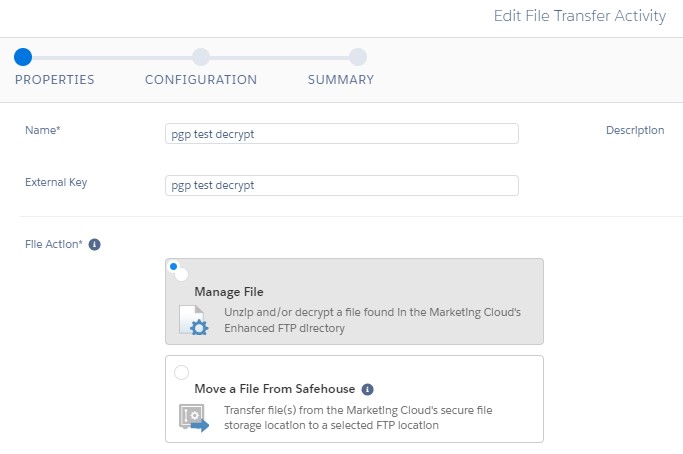
First, you need to set up a file drop activity (or a schedule, if you prefer) and then define the file transfer that will handle decryption. This time, choose "Manage File" to get to the decryption options on the following page.
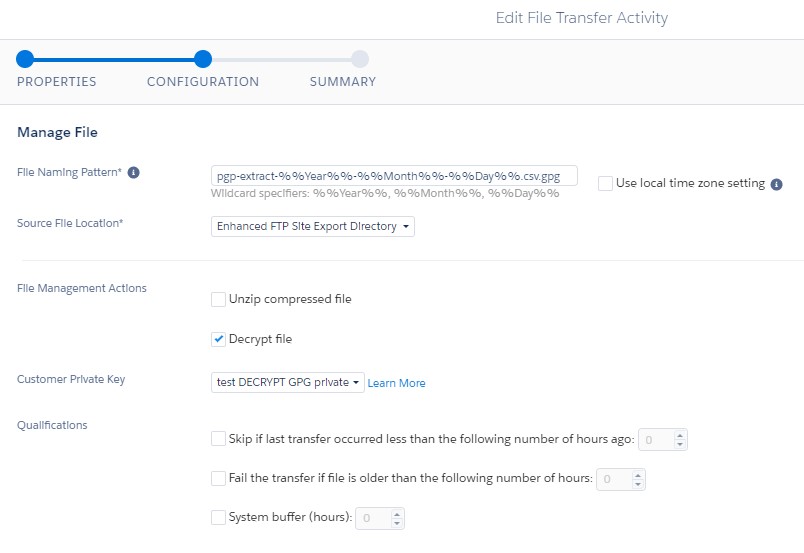
Make sure you click on "Decrypt file" and then select the correct private key. The File Naming Pattern should match what you have set up in the File Drop entry event. You can make your life easier by typing in %%FILENAME_FROM_TRIGGER%% instead.
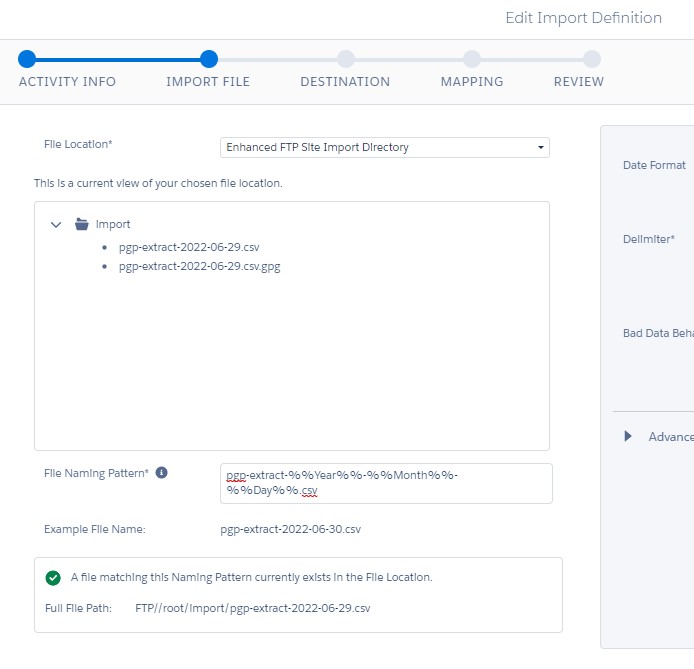
Next up is the import file activity. Make sure you set up the file name pattern without the trailing ".gpg" because this activity works with the decoded result from the previous file transfer.
The rest is standard. Choose the target DataExtension and set up field-column mapping accordingly.